The sender sends the transfer. The receiver confirms it arrived.
Before you start
- A second location. Add it under Stock > Locations.
Steps
-
Click Stock > Stock actions, open the Transfers tab and click New transfer.
-
Choose From and To. Click Choose a product and type the Quantity. Click Add a product for more. Click Save draft.
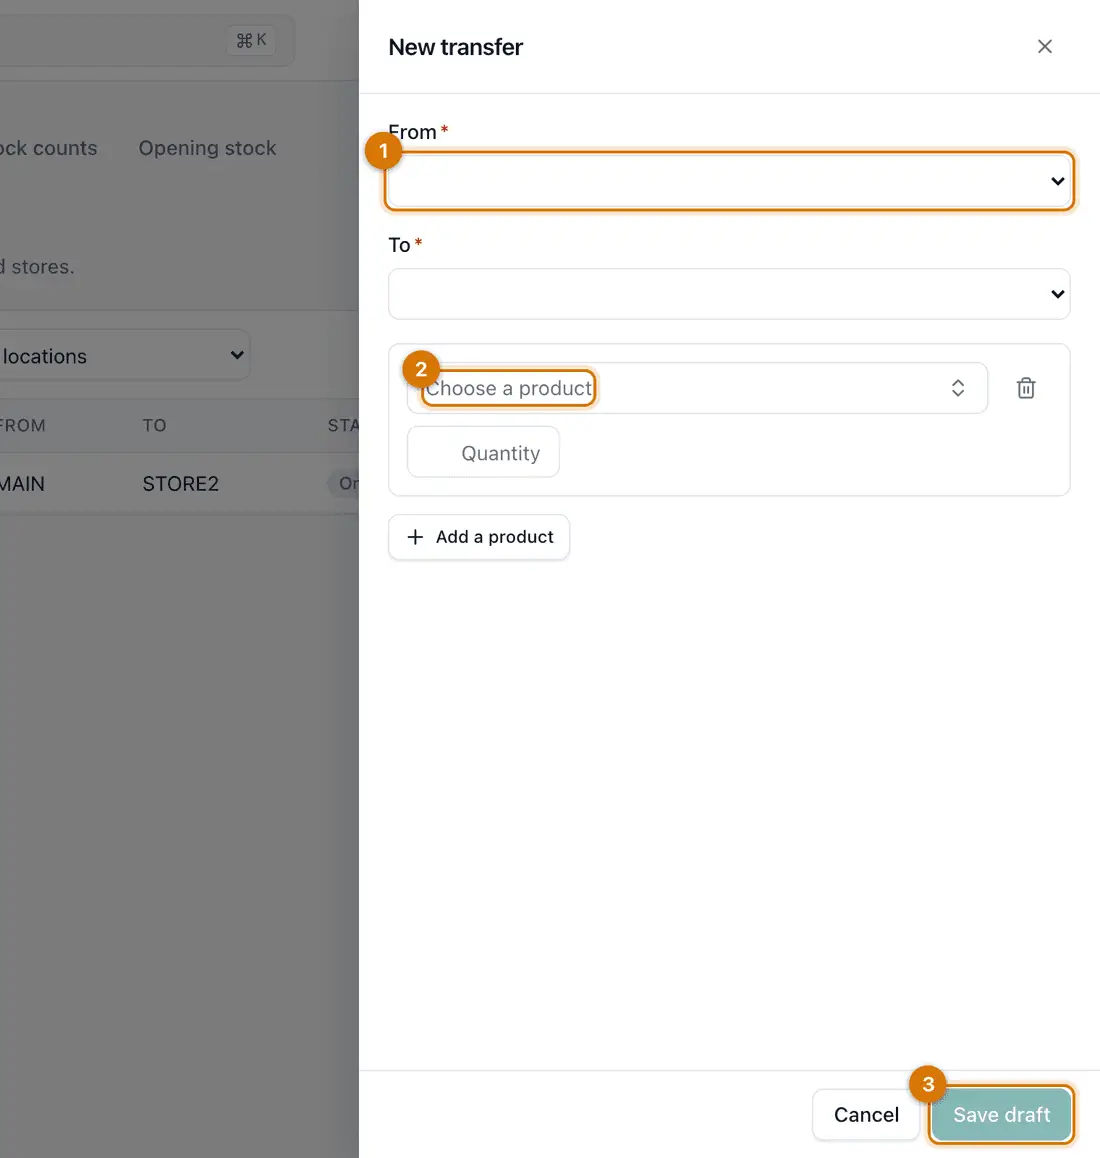
- From and To
- Product and quantity
- Save draft
You should see: A transfer such as TRF-MAIN-000001 opens as a Draft. Stock has not moved yet.
-
When the goods leave, click Send stock and confirm.
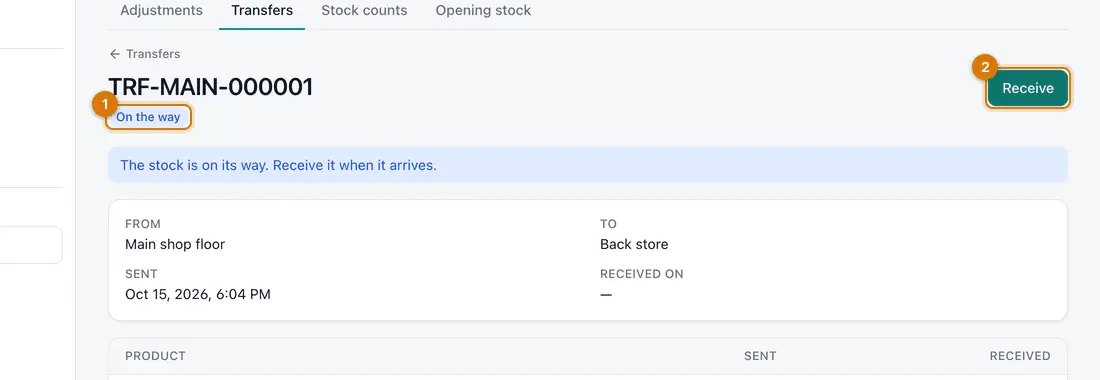
- Status
- Receive
You should see: The status is On the way. Stock leaves the sending location.
-
At the other end, open the transfer and click Receive.
-
Click Receive all as sent if everything arrived. If not, change the Received quantities, choose a reason for each difference and click Receive with differences.
You should see: The status becomes Received and the stock is added at the destination.


If something goes wrong
I cannot send the stock
The sending location does not hold enough. Check Stock levels, or lower the quantity.
Less arrived than was sent
Enter what arrived and choose a reason. The difference is recorded.
I made the transfer by mistake
While it is a Draft, click Cancel transfer. Once sent, it must be received or corrected with an adjustment.
Still stuck? See Fix common problems.