Do this once for each product and store. After that, stock changes through sales, purchases, transfers and adjustments.
Before you start
- Your products added, and a count of what is on the shelves with what each item cost you.
Steps
-
Click Stock > Stock actions, then the Opening stock tab.
-
Choose the Location. Your first store is called Main store. Leave Stock as at on today, or set the date the count was true.
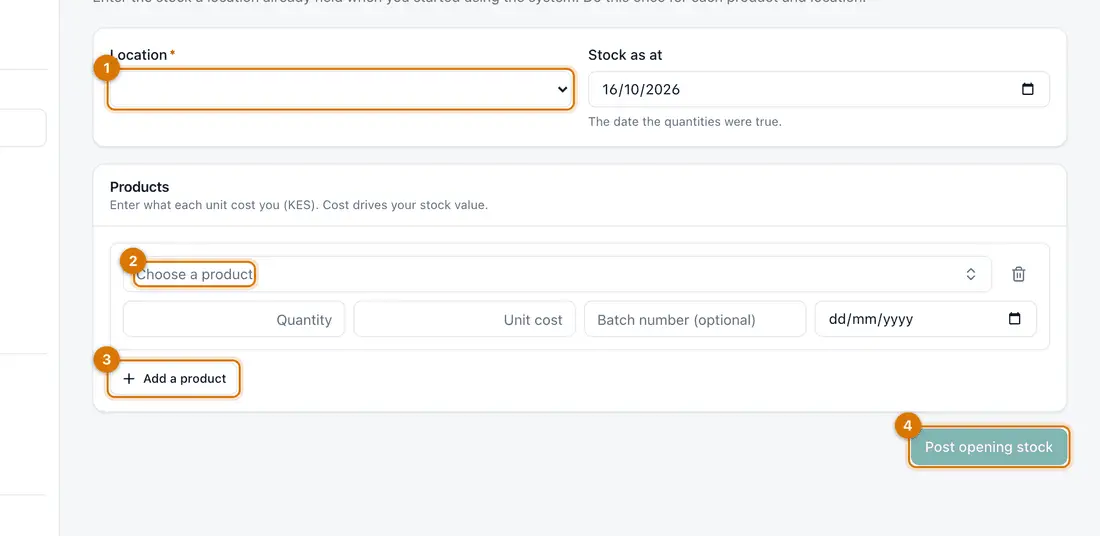
- Location and date
- Product, quantity and unit cost
- Add a product
- Post opening stock
-
Click Choose a product and pick it. Type the Quantity and the Unit cost (what each one cost you).
-
Click Add a product for the next one. The bin icon removes a row.
Selling by batch? Also fill in Batch number (optional) and Expiry date (optional).
-
Click Post opening stock, then click Post opening stock again to confirm.
You should see: A message: Opening stock posted for 1 product(s).
-
Click Stock > Stock levels to check.
You should see: Each product shows its quantity.

If something goes wrong
I need another place to keep stock
Click Stock > Locations and New location. Choose the Branch, type a Code and a Name, and click Save.
I posted a wrong quantity
Posted stock cannot be edited. Correct it with an adjustment: see Adjust stock and count stock.
I cannot find a product to choose
It is not added yet, or its Type is not Stock. Only stock products have quantities.
Still stuck? See Fix common problems.